

Monstera adansonii is one of the most expensive Monstera species you can get. Not only is the plant rare, but its unique characteristics make it a must-have for plant owners who would stop at nothing to get it.
However, there is an easier way to increase your Monstera adansonii collection, and that is to propagate Monstera adansonii.
Read below for all you need to know about Monstera adansonii propagation and more.
A Brief Introduction to the Monstera Adansonii Plant

The genus Monstera consists of 48 flowering plant species, and adansonii is one of the rarest among them.
Native to the tropical rainforest of Central and South America, the adansonii goes by many names, including:
- The Swiss Cheese Plant
- The Swiss Cheese Vine
- The Monkey Mask Plant
- The Five Hole Plant
- Adanson’s Monstera
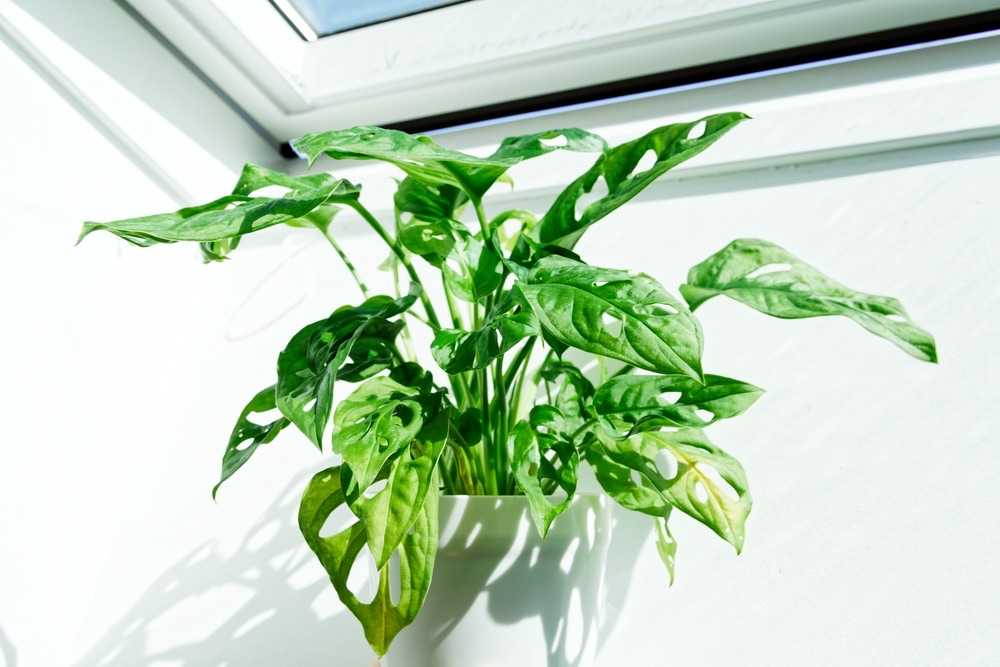
The Monstera adansonii is a type of Monstera plant that is popular for its beautiful lush foliage and trailing vine. The vining plant is easy to keep and is one of the easiest plants to propagate due to its growth rate.
However, propagating Monstera adansonii has its challenges. One of the biggest challenges is choosing a particular propagation method.
Below, we discuss the different Monstera adansonii propagation methods and the best choice for your Monstera adansonii plant.
How to Propagate Monstera Adansonii?

There are several different species of Monstera adansonii, and you can propagate all of them through three different methods:
- In soil
- In water
- In moss
Choosing between the three ultimately comes down to preference and availability of materials. The three methods have an equal success rate but varying difficulty levels, depending on the swiss cheese plant owner.
There are several reasons why you would want to propagate your Monstera adansonii. Some of the reasons to propagate Monstera are:
- An adult Monstera adansonii is too expensive. Getting stem cutting of the mother plant is less costly.
- Your own plant is infected. If the existing plant is infected and beyond saving, you can use propagation to help you cover your losses.
- You want more adansonii plants. If you want to create a Monstera adansonii family, you can use the mother plant to produce children, which can grow up to become mother plants of their own.
- You want to sell Monstera adansonii. Many people desire the Monstera adansonii plant. Therefore, if you want to sell the Swiss cheese plant cutting or give it to a family member or friend, you can propagate new ones.
Before we go into the methods themselves, we must first understand the first step of propagation for each method.
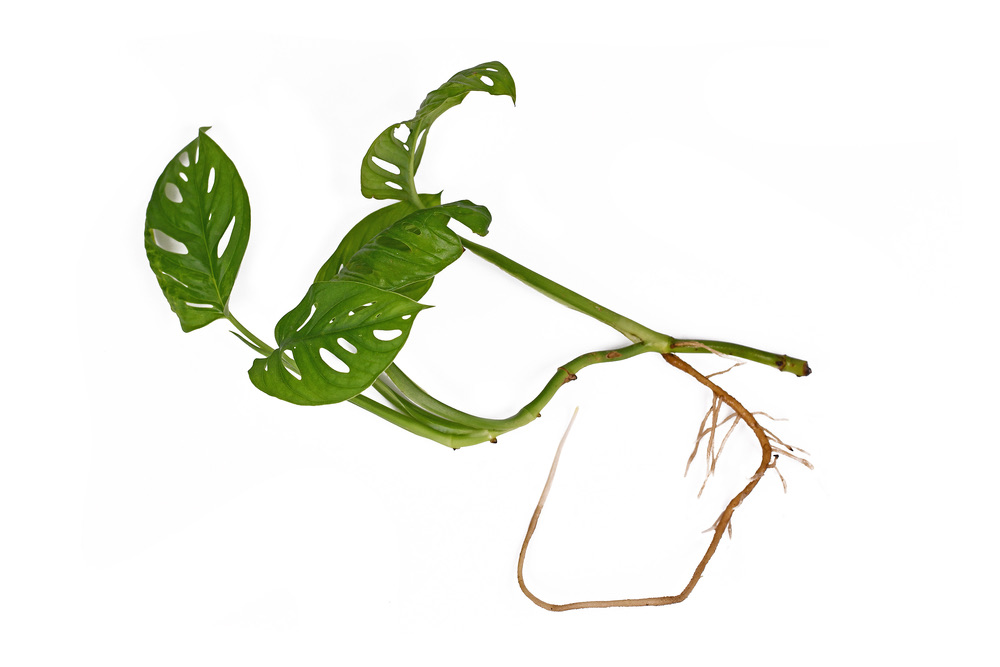
Propagating Monstera adansonii starts with cutting a part of the plant, and the step is similar for each type of propagation.
Cutting Monstera Adansonii

Monstera adansonii propagation requires you to cut a piece off the original plant and use it for propagation.
Generally, you must cut off a piece of a stem from the swiss cheese vine and use the stem cutting for further propagation.
However, like every other procedure we will discuss, there is a correct way of doing things.
For cutting, you must use sterile scissors or shears. You can sterilize your tools using rubbing alcohol. This is to ensure that the stem cutting is not infected.
Then, you must decide which part of the vine to cut.
If you have a diseased Monstera adansonii and want to propagate it to get a healthy plant, you must find a part that is not infected. Otherwise, you can choose randomly, given that you fulfill the conditions.
The condition of a good stem cutting is that it is cut at the node. The nodes are the dark brown bulging parts on the stem. These are structures where new aerial roots and adansonii leaves will grow.
The plant cuttings should have at least one node. Nodes are highly pluripotent (have higher capabilities of growing into a new plant) and are the best choice for stem cutting.
Generally, a node with a few leaves and roots growing out of it would be best. Even if there are none, you can still use the cutting. Cut the stem one inch below the node.
After you obtain stem cutting, you can choose one of the three propagation methods.
Propagating Monstera Adansonii In Soil
Soil propagation is the most popular method used for Monstera.
This is because the Monstera grows in soil in its natural environment, with its adventitious roots spreading out until they reach a tree, by which point it develops aerial roots.
Moreover, soil propagation requires fewer steps. Hence, most plant owners tend to propagate Monstera adansonii in soil.
Step-by-Step Guide
Follow the steps below for soil propagation:
Step 1: Cutting
Choose a healthy part of the adansonii plant, and cut the stem as instructed.
For soil propagation, you should ensure that the stem cutting is at least two to four inches long.
Step 2: Placing the Stem Cutting
Before placing your swiss cheese vine cutting into the soil, you must choose an appropriate soil mix.
Generally, you can use a commercially available potting mix for aroid plants. Monstera adansonii prefers slightly acidic soil with good drainage abilities.
Then, you must choose the right pot. Ensure the pot is not too big and has adequate drainage holes to prevent water accumulation.
Place your Monstera cutting in the soil, pushing the node into the soil. The node (brown nubs) must be below the soil line, as this is where the roots will grow.
Step 3: Soil Propagation Care
Place the pot in an area that receives enough bright indirect light. Generally, Monstera adansonii requires six to ten hours of light daily.
Moreover, you must give it plenty of water and keep it in warmer temperatures than normal household temperatures to ensure proper growth.
How Long Does Soil Propagation Take?

One of the downsides of soil propagation is that you can not actively see the roots growing.
Therefore, it can be hard to tell the progress of your Monstera adansonii growth.
The adansonii root system develops quickly, and new little roots will develop in a few weeks.
Generally, it takes around three to four months for the Monstera adansonii to be fully rooted, at which point you can transfer the young plant to another pot.
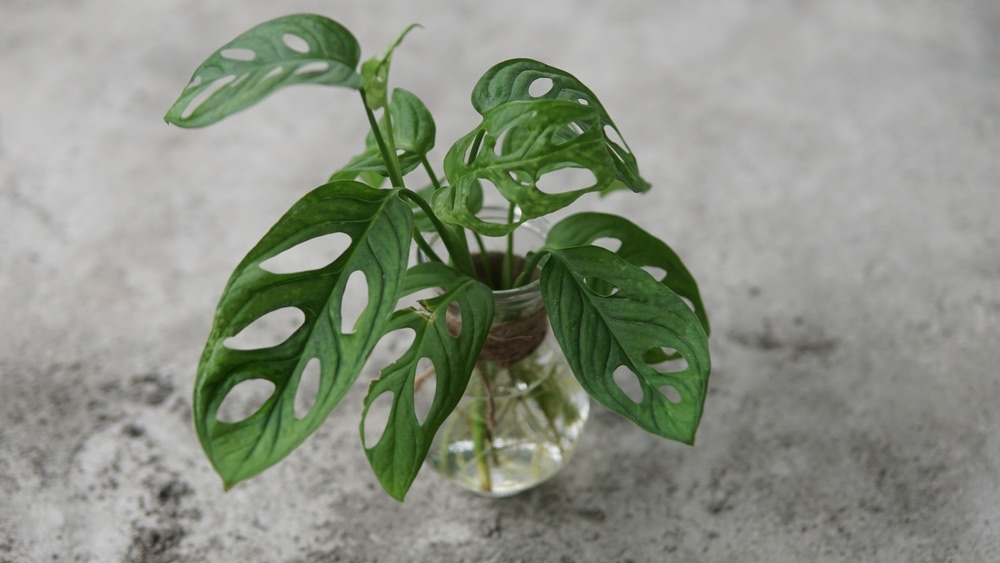
Propagating Monstera Adansonii In Water
Propagating Monstera adansonii in water is the second most common technique gardeners use.
This is because water propagation allows you to see the progress of your stem cuttings.
Moreover, it does not require as many resources as the other two methods.
To propagate Monstera adanosonii in water, you must submerge your adansonii stem cuttings in water, letting it grow new roots and leaves in water.
However, one downside of water propagation is that the plant becomes susceptible to root rot because of excess moisture.
Root rot is caused by a fungal infection that causes the roots to decompose. Therefore, you must be extra careful.
Step-by-Step Guide
For water propagation, follow the steps below:
Step 1: Cutting

Choose a healthy part of the Monstera adansonii, and cut it as discussed. Use a pair of shears or a sharp blade.
Step 2: Place The Plant Cutting in Water

Once you have your plant cutting, place it in water.
The water must be warmer than your room temperature, as Monstera adansonii care requires warm temperatures.
The node must be fully submerged in water.
You can use any container to hold your water. Different containers for water propagation include plastic and glass containers, and your choice depends on your desired aesthetics.
Step 3: Trim Extra Leaves
If you notice that some leaves on your cutting are submerged, trim them. These leaves are highly susceptible to rot when in water.
Step 4: Water Propagation Care
Place your container in a warm area that receives plenty of indirect light. Change the water every week to replenish oxygen and prevent fungal growth.
How Long Does Water Propagation Take?

One of the benefits of water propagation is that you can see the progress of your plant’s growth. After a few weeks, you will see new leaves and roots form.
Around four to six weeks into the propagation, adansonii roots will grow around four inches long, and if you notice a new leaf, it means your propagation was successful.
You can transfer your Monstera adansonii plant to the soil at this point or keep it in water.
If you give it plenty of sunlight and proper care, you can keep your Monstera in water.
However, Monstera generally prefers soil, as it allows the roots to grow stronger.
Propagating Monstera Adansonii In Moss
The last method we will discuss is moss propagation.
Moss-propagated Monstera adansonii tends to be healthier than other methods, mainly because moss acts as a nutrient medium for the plant.
Sphagnum moss is a plant-based product that you can find in any gardening center.
Moreover, this technique is especially useful if you do not have the right materials, or preference, for water or soil propagation.
Step-by-Step Guide
Follow the steps below for moss propagation:
Step 1: Cutting

Like the process mentioned before, cut a part of the adansonii plant with a couple of nodes.
Cut the vine from the top and the bottom. Your Monstera adansonii cutting should be a few inches long.
Step 2: Preparing Sphagnum Moss
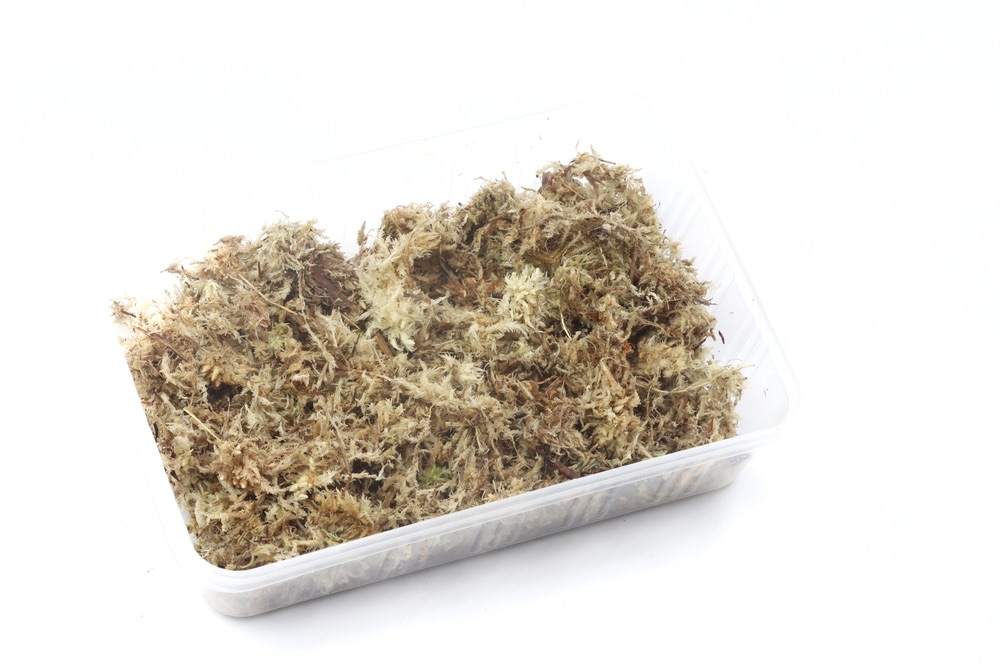
You can buy moss online or at a plant center. Place the moss in a bowl full of water. Let the moss soak for around 15 to 20 minutes.
Once the moss is soaked, remove it from the container and gently squeeze it to remove excess water.
The moss should be damp but not dripping with water. Excess water can make it difficult to proceed with the second step.
Step 3: Wrapping Stem Cutting
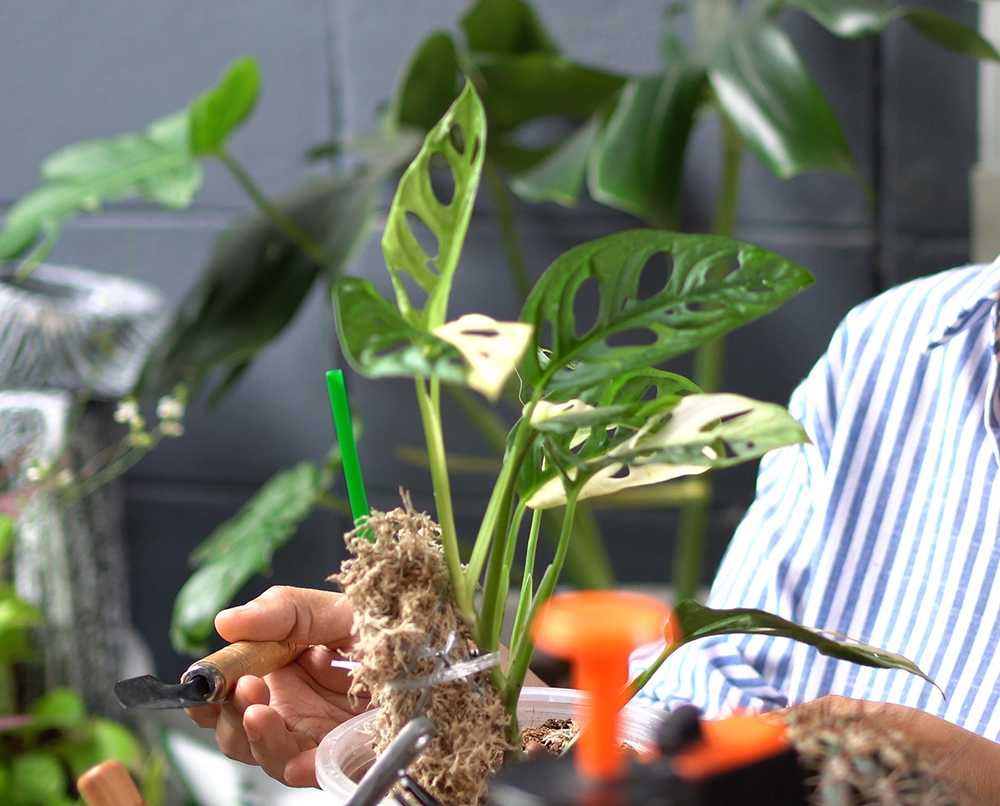
Once you have prepared the stem cutting and the moss, gently wrap the damp moss around the stem.
Wrap the node completely with the moss to ensure no air gets inside. If you wrap it too loosely, your plant will dry out.
Step 4: Covering the Cutting
Next, you must wrap the moss with plastic wrap. While this step is not essential, it helps keep the nodes sealed and allows the adansonii to create a humid environment.
Place the cutting in a plastic tray and cover it with a plastic lid. You can also use any similar container as long as you can replicate the structure.
Step 5: Moss Propagation Care
Place the moss-covered cutting in a warm area of the house that receives enough light. Once you notice the roots develop, you can place the cutting in a pot with potting mix.
How Long Does Moss Propagation Take?
Generally, you will see root development within a few days. These little roots can take a couple of weeks to grow before you can transfer them to a pot.
In the pot, it can take a few weeks until you see a leaf forming. Keep providing the plant with enough water, appropriate temperature, and humidity to ensure active growth.
Troubleshooting Monstera Adansonii Propagation
The three methods explained above have an almost equal rate of success. However, your propagation may fail.
There are several reasons why your Monstera adansonii propagation failed:
- The stem cutting is in stress. This could be due to the stem cutting being in the cold air for too long before propagation. If you buy Monstera adansonii cutting online, you must be careful about the kind of environment it is kept in.
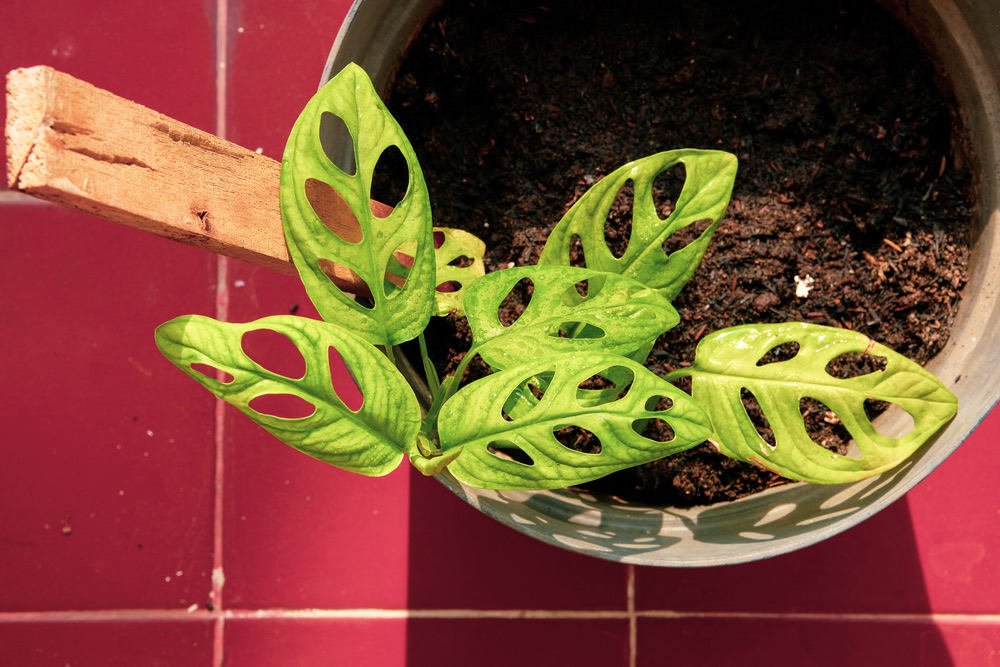
- The plant could be infected. While it is more likely for water propagation, fungal infections can develop in moist soil and moss. The infection causes the plant to deteriorate and eventually die. You might notice yellow leaves with black spots if your adansonii plant is infected.
- The plant does not have enough water. When you propagate Monstera adansonii in soil or moss, the plant is at risk of drying out. You will notice brown leaves with crispy edges or drooping leaves if the Monstera plant is not getting enough water.
- The plant is not receiving appropriate lighting. Too little light can hinder the growth of the small plant, while too much light can cause leaf burn.

Taking Care of a New Plant
Once your propagated adansonii grows, you must take appropriate care of the plant. Like most Monstera plants, the adansonii has strict plant care guidelines.
When taking care of propagating plants, you must keep the adansonii care conditions in mind:
- Watering: The swiss cheese plant requires moist soil to grow, much like the Monstera deliciosa. However, as it does not grow as big as the Monstera deliciosa plant, you must be careful how you water it. Underwatering can lead to dehydration and wilting while overwatering can lead to fungal infection.
- Light: The Monstera adansonii requires six to eight hours of bright indirect light. Keep the plant away from bright light or direct sun as it could dry out the adansonii and burn the leaves.
- Temperature and Humidity: Monstera adansonii requires a temperature between 50 to 80 degrees Fahrenheit for healthy growth. Similarly, the plant prefers high humidity levels above 50%. You can place the adansonii with other plants so they share their humidity.
- Feeding: You can add fertilizer to the potting mix to ensure the adansonii grows healthy. However, overfeeding can lead to root blockage. Only feed the plant in growing seasons when it needs nutrients.
- Soil: Adansonii prefers moistened soil. You can add orchid bark or perlite to ensure good drainage in the soil. You can also add peat moss to ensure water retention.
- Support: The swiss cheese plants are hemiepiphytic, which means they grow in the soil and on trees. To keep your Monstera adansonii plants happy, give them support for the plant’s aerial roots to attach to and grow. You can use a moss pole or hanging baskets to ensure the vining plants grow well.
Frequently Asked Questions
1. Can Monstera Adansonii live in the water forever?
While the adansonii plant prefers soil for growth, it is also highly adaptable and can grow in water. You can keep your Monstera adansonii in the water forever.
However, it would not grow as big as it would in soil. Moreover, new growth might be slow.
Whenever a new leaf grows, the older ones would fall off. This is because the plant does not have enough resources to handle the new growth.
2. How long does it take to propagate a Monstera Adansonii cutting?
Propagation time differs slightly depending on the type of method you use.
In water, Monstera adansonii propagation could take anywhere from a few weeks to a few months for plant roots and leaves to develop. Typically, you will see roots sprouting after a few weeks.
In soil, propagating the swiss cheese plant can take around three months before you start seeing signs of growth.
In moss, Monstera adansonii propagation can take anywhere from two weeks to a month before you start to see signs of active root growth.
Generally, you can see new growth after a few weeks. Keep the plant in indirect sunlight for a few hours daily to ensure new growth.

My name is Daniel Elrod, and I have been houseplant love ever since I was 17. I love how much joy they bring to any room in the home. I’ve always been amazed at how a few pots of flowing leaves can turn a drab and sterile office into an inviting place where people love to work at.


