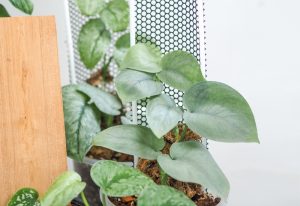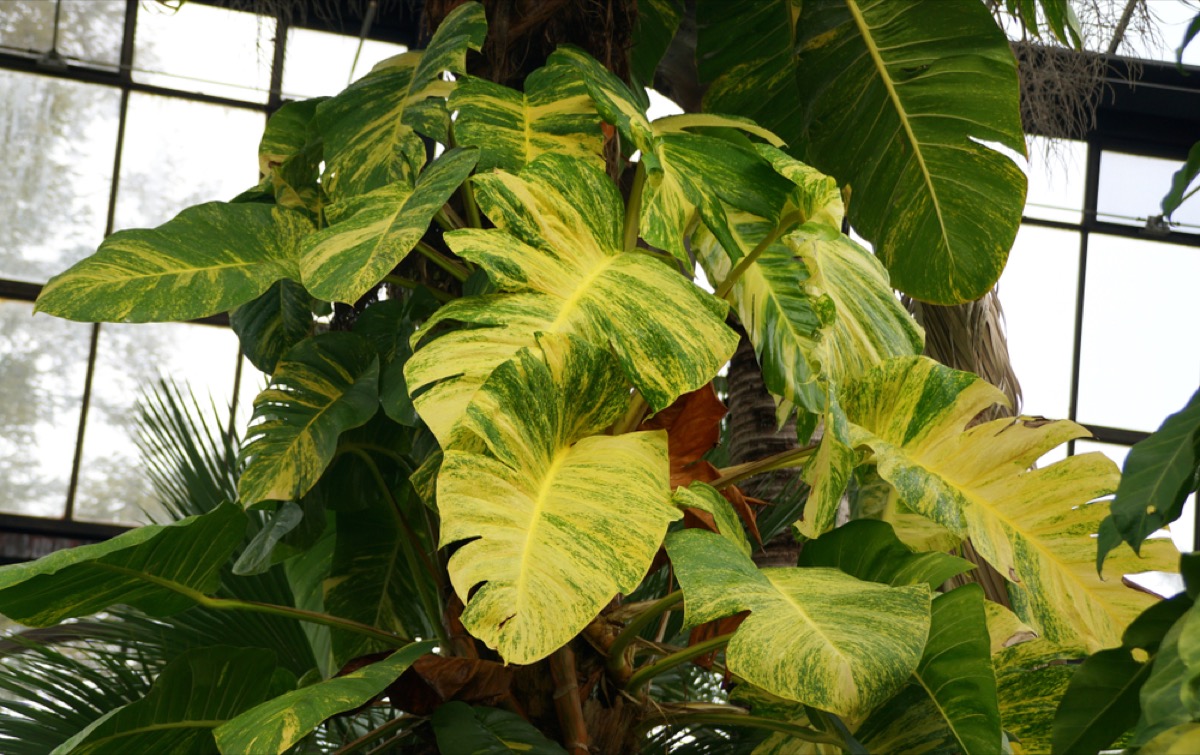
Giant pothos, a popular and visually striking houseplant, is known for its large, heart-shaped leaves and its ability to purify the air. One of the charms of this plant is its adaptability and ease of care, making it an ideal choice for both beginners and experienced plant lovers. Propagating giant pothos not only expands your collection but also allows you to share this beautiful plant with friends and family. In this article, we will explore how to propagate giant pothos so that you can enjoy even more of this stunning plant in your home.
To begin, it is important to understand the process of propagation, which involves taking stem cuttings from a healthy plant and using them to grow new plants. This can be done either through water propagation or directly in soil. When it comes to giant pothos, the best method is propagating directly in soil. This ensures proper support for the growing plant and helps achieve the desired large leaves and vigorous growth.
In order to successfully propagate giant pothos, you’ll need to follow certain steps such as taking appropriate stem cuttings, using a well-draining soil mix, and providing the right environmental conditions. By paying attention to these key factors, you will be able to cultivate gorgeous, thriving giant pothos plants that will make a stunning addition to your indoor garden. Let’s dive into the process of propagating giant pothos and learn how to nurture new plants from cuttings!
Preparing the Tools and Workspace
Before starting the process of propagating giant pothos, it’s important to set up your workspace and gather the necessary tools. Having a clean and organized area will make the process much more manageable.
Identifying Appropriate Stem Cuttings
The first step is to select healthy stem cuttings from your giant pothos plant. Look for stems that have fresh green growth on the end and at least two, preferably three, leaves. Find the node – the raised bumps every 2-3 inches along the stem. This is where roots will grow. Take cuttings that include one or two nodes. Make sure to use a sharp, clean blade for making your cuts.
Gathering Tools and Supplies
Once you have selected the appropriate cuttings, gather the necessary supplies to propagate your giant pothos. Here’s a list of items you’ll need:
- A clean and sharp pair of scissors, garden shears, or a knife
- Rooting hormone (preferably in powder form)
- Small pots or containers with drainage holes
- Potting soil, specifically one that is well-draining and lightweight
- A tray or saucer to catch any water overflow
To make the process smoother, consider organizing your tools and supplies on a clean and sturdy work surface. Ensure you have access to water and a place to dispose of any plant debris.
With your workspace prepared and tools assembled, you can now progress to the next steps of propagating your giant pothos, such as dipping the cut end of the stem in rooting hormone and planting the cuttings in soil.
Taking Stem Cuttings
Selecting Healthy Stem Growth
When planning to propagate your giant pothos, it’s essential to choose healthy stem growth as your starting material. Look for stems with vigorous growth, free of any yellowing or wilting leaves. The chosen stem should have at least two to three healthy leaves at the top and several nodes along its length. Nodes are the small bumps on the stem where new roots will eventually grow.
Making Clean, Diagonal Cuts
Once you’ve identified the appropriate stem, prepare your cutting tools by disinfecting them with a solution such as 1 part bleach mixed into 9 parts water, rubbing alcohol, or hydrogen peroxide. This step helps to prevent introducing any bacteria to the cut when you slice into your pothos.
With your disinfected cutting tool, make a clean, diagonal cut about 8-10 inches (20-25 centimeters) below the healthy nodes of the selected stem. A diagonal cut increases the surface area for root growth and helps the cutting absorb more water. After making the cut, remove any leaves present on the lower 3-4 inches of the cutting. This ensures that your cutting focuses on root development rather than maintaining unnecessary leaves.
Here’s a quick summary of the steps to take for selecting and preparing the stem cuttings:
- Choose a healthy, vigorous stem with no yellowing or wilting leaves
- Identify a section of the stem with several nodes
- Disinfect your cutting tool with bleach, rubbing alcohol, or hydrogen peroxide
- Make a clean, diagonal cut below the healthy nodes (8-10 inches long)
- Remove any leaves on the lower 3-4 inches of the cutting
With these steps completed, you’re now ready to propagate your giant pothos. Place the stem cuttings in a potting mixture of half peat moss and half perlite or sand, ensuring that the first set of root nodes is covered. Keep the soil moist and your rooting pothos out of direct sunlight for the best results.
Establishing a Rooting Medium
When propagating giant pothos, establishing a suitable rooting medium is a critical step. This section will cover two popular methods: water propagation and soil propagation.
Water Propagation
Water propagation is a simple technique that helps your pothos cutting develop roots before transplanting it to soil. Follow these steps to encourage healthy water-rooted cuttings:
- Take a healthy cutting with one or two leaves and a node.
- Remove any lower leaves that could be submerged in water.
- Place the cutting in a glass jar or container filled with clean water, ensuring the node is submerged.
- Keep the container in a warm, well-lit area with indirect sunlight.
- Change the water frequently to maintain freshness and prevent bacterial growth.
- Monitor the cutting and wait for roots to grow, which typically takes a few weeks.
Soil Propagation
Directly propagating giant pothos in soil is a more natural approach and can lead to quicker establishment of larger plants. Follow these steps for successful soil propagation:
- Choose a healthy cutting with one or two leaves and a node.
- Dip the cut end in a powder rooting hormone to promote root growth.
- Prepare a pot with drainage holes and fill it with a mixture of peat moss and perlite or sand for optimal drainage.
- Make a small hole in the soil using your finger and place the hormone-dipped cutting inside.
- Carefully cover the node with soil and gently pat it down.
- Keep the soil consistently moist and place the pot in a warm, well-lit area with indirect sunlight.
- Within a month or two, your cutting should develop roots and begin to establish itself in the soil.
By following these guidelines, you can successfully propagate your giant pothos and establish a healthy rooting medium using either water or soil methods. Remember to be patient and provide the appropriate care, and soon you’ll have a thriving new plant.
Monitoring the Progress
When propagating giant pothos, it’s essential to closely monitor the progress to ensure successful growth. In this section, we will discuss helpful tips for healthy root formation and how to watch for growth.
Tips for Healthy Root Formation
- Soil: Choose well-draining soil for planting your cuttings. This will help prevent root rot and encourage successful root growth.
- Moisture: Keep the soil evenly moist but not soaking. Maintaining the right moisture level is crucial for the development of robust roots Teak and Terracotta.
- Indirect Sunlight: Place the potted cuttings in a location with bright, indirect light. Avoid direct sunlight, as it could damage the leaves or dry out the soil The Spruce.
- Nutrients: Provide a balanced, water-soluble fertilizer every 4-8 weeks in half or quarter strength to support root growth Balcony Garden Web.
Watching for Growth
During the propagation process, observe the following aspects to ensure your giant pothos is growing successfully:
- Root development: Look for new roots forming at the base of the cuttings. It usually takes around a month or two before visible root growth occurs Teak and Terracotta.
- Leaf growth: Keep an eye on the leaves. They should start to show new growth, indicating that the cutting is successfully propagating.
While propagating giant pothos, patience is key. Monitoring the aforementioned aspects will help you achieve healthy, thriving plants. Follow these tips and watch your pothos grow into a stunning specimen.
Transplanting the New Growth
Tips for Successful Transplanting
To transplant your new giant pothos growth, first, prepare a pot with drainage holes and fill it with a mixture of half peat moss and half perlite or sand. This mixture will help the plant establish roots and drain excess water effectively.
When preparing the new growth for transplanting, take the pothos cuttings and remove the first leaf above the cut ends. Then, dip the cut end in a rooting hormone to promote faster root establishment. Make sure you cover the first set of root nodes with the hormone.
Once the cuttings are ready, make a small hole in the potting mixture using your finger or a small tool. Gently place the cutting into the hole, covering the nodes with the soil. Press the mixture firmly around the stem to keep it in place.
Caring for the New Plant
After transplanting the new growth, there are a few essential care steps to ensure your giant pothos thrives:
- Maintain consistent soil moisture by watering the plant when the top inch of soil feels dry to the touch. Be careful not to overwater, as this can lead to root rot.
- Keep your newly transplanted pothos in a bright, indirect light, avoiding direct sunlight, which could cause leaf scorching.
- Provide a stable environment with warm, consistent temperatures and humidity. Pothos plants prefer temperatures between 65 and 75°F (18-24°C) and moderate humidity.
- Fertilize the new plant with a balanced, liquid houseplant fertilizer diluted to half strength every 4-6 weeks during the growing season.
Following these care tips will greatly increase the success of your newly transplanted giant pothos and promote healthy, continued growth.
Conclusion
Giant pothos are eye-catching plants that can elevate the aesthetic of both indoor and outdoor gardens. Taking care of them involves providing proper growing conditions, which include offering bright yet indirect light, maintaining consistently moist soil, and ensuring high levels of humidity around the plant1.
When it comes to propagating giant pothos, the ideal approach is to take a cutting with one or two leaves and a node and place it directly in the soil2. To improve the chances of successful propagation, follow these steps:
- Choose a healthy vine with at least one node
- Cut the vine just below the node
- Place the cutting in a pot filled with well-draining soil
- Keep the cutting moist, warm, and humid
- Provide plenty of indirect sunlight
Expect roots to form within a month or two. Remember, propagating giant pothos is best done during the plant’s active growing season, specifically in the spring and summer months3. This increases the chances of successful propagation and ensures the mother plant recovers smoothly from the process.
In summary, properly caring for and propagating giant pothos enables you to enjoy the beauty of this plant for years to come, with minimal effort.
Helpful Video

My name is Daniel Elrod, and I have been houseplant love ever since I was 17. I love how much joy they bring to any room in the home. I’ve always been amazed at how a few pots of flowing leaves can turn a drab and sterile office into an inviting place where people love to work at.